Sunday, 29 April 2012

Fashion: Day 5: 'Strike' Day

Before going into strike the set, Sacha and I drove in to Maidstone to take back the corner table we borrowed from a shop. When we arrived back, Lucie, Ian and Martin had already removed the panelling, skirting and dado rail, removed the door, taken down the walls & disassembled the window.
 
Disassembled Window
 We decided to do it this we as Sacha and I are the leads in props, casting and fashion so thought it was best to let the build, health and safety and lighting leads take down most of the set (so we did not get in the way) while we organised removal of the props and arranging issues with the fashion to be resolved.
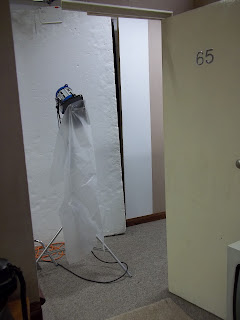
As most of the lighting and the littler props had already been taken down and removed yesterday to make it easier for us to work today there were only a couple of major things to do. We began by taking down the space light, Lucie, Ian, Steve and I carefully removed the space light from the goal posts and off of the pole which Lucie then returned to the lighting area in studio 2. We then removed all of the props from the studio which were put in the gallery space on the ground floor which were later picked up by Sacha's boyfriend, Jack at 4pm who took them back to the places we borrowed them from for a donation. Due to previous arrangements when picking up our props Jack also dropped off tree branches and stumps needed as props for two group's set build next week which Sacha, Jack & Lucie took up to studio 1.
I vaccuumed the borrowed carpetting which we then rolled up, and took down the polyboards we used to black out behind the camera as well as the colorama and black out material.
Some of our props have been left in the studio out of the way of next week's group for another group's set build, this includes, the door, skirting board & the side table which is being used in week three.


Finally I re-hoovered the whole studio due to the dirt that came off of the carpet when taken away.
Striked Set
Unfortunately during the shoot what we believe to be hairspray residue and eyelash glue got on to the dress which we had planned to return to the shop we pruchased it from for a 90% refund. Sacha and I went down to fashion today to see if we could get any advice on how to remove the marks to return it. The member of staff we found was very helpful and explained that she had a product to remove sticky stuff from clothing, therefore we will return on Monday to try out this product. She also said that chalk may work on the hairspray marks which look like grease stains as it would absorb it so we will also try this out; otherwise we will take the dress to a dry cleaners which should be able to easily remove the marks.        

Fashion: Post-Production Photoshop Tutorial


Phocus

-          Major editing such as colour temperature should be done in phocus.
-          Job info
> Destination: [RAW Files Destination]

-          ‘Adjust’ tab:
> colour temp can be changed
> colour correction- select colour with eyedropper tool & then change tint on colour wheel.


-          Modify:
> Change something about one image
> Select other images which we want to extend our changes to
> Click modify- this will give them the same adjustments.

-          Preferences:
> ‘Save Adjustments’ should be set to ‘Always Save’.

-          Export:
> export as TIFF

-          Naming of Folders:
> Main Folder- [name of project]
> [name]_preview
> [name]_raw
> [name]_tiff

-          When  saving on photoshop- save as PSD or TIFF
-          Check blacks for colour cast.

Photoshop

-          Image Size:
> Pixel dimension should never change
> unclick ‘Resample image’
> when changing document size- 110cm width, keep resolution the same
> ‘Save as’ when taking away info.

-          Use Ctrl + space to select ‘actual pixels’ which allows viewing at 100%

-          Dust/scratch removing:
> Create a new layer (make sure to always work on correct layer)- [Dust/Scratches] layer should sit on top of background with nothing in between.
> Spot healing brush Tool (100% hardness)- automatically samples, for even surfaces eg. skies.
> Healing Brush Tool (100% hardness)- (all layers) alt + select area to sample from eg. close to edges & lines.
> Clone stamp tool- use when the other two tools do not work (have ‘sample all layers’ ticked).
> Bracket keys can be used to increase and decrease the zoom.

-          Never use adjustments from top bar always from the layers section on the right.
-          Curves:
> Contrast & colour corrections
> S shape
> Use one curve for one change eg. luminosity, rename and then create another.

-          Masks:
> Select a mask on a layer/curve (if white everything is selected, if black nothing is selected).
> To select areas- use a soft & large brush tool.
> Shortcut to make mask black- command + backspace with the second colour square black or edit> fill> change colour
-          Use back slash key to highlight what has been selected by brush tool
> Alt + click mask to look for any holes in the selection.

-          Selective Colour:
> select a colour using eyedropper, choosing colour from a list & then slide bars to change tone
> use before curves to change eg. skin tone

-          Use arrow button in bottom bar & select document profile
> in photoshop always should be Adobe RGB 1998 file.
> monitors cannot represent all of the colours in colour space
> so do papers therefore colours will look different from screen to paper.

-          View> Proof Setup> Custom> Device to simulate: (set to profile given)- EP4880 imediaT Photo Lustre paper.
-          SP9800 is used to print at a larger scale.
-          Black point compensation & simulate paper colour turned on then turn preview on & off to check colour tone etc.
-          Gamut warning on with Proof Colour on (under View)- this shows any colours that cannot be represented by the monitor & therefore the printer will not be able to produce the colour (only happens with saturated image).

-          File> New> Size: A3
-          Click ‘Advanced’> Adobe RGB 1998

-          Print Corrections:

> flatten layers before doing corrections for printing (save this for digital hand in).

-          For printing:
> Image Size: 300 resolution, resample image, change width to 10cm
> Add a curve- brighter
> Flatten the layers and move over to new canvas which will fit around 12 on.
> Then undo flattening, hide first curve, add new curve to make brighter & repeat flattening and moving.
> Continue doing for 3-5 tests as if doing a test strip.
> Do the same with colour tone- warmer/ cooler etc.
> Also include an unadjusted image on test strip
> ‘Save as’ test strip.

-          Save final image as PSD for Bjorn to print with print adjustment layers included eg. Bright 1 curve
-          We should save final image as [title of project]_final_number.
-          Print test file with lower resolution- decide on print adjustments (name curves ‘Print Adjustments’) from test strip- move onto proof print file & Bjorn’s file.

-          File > Print >
       1.       Printer: Epson left Semi/Gloos
       2.       Photoshop Manage Colours
       3.       Profile: EP4880 imediaT photo lustre
       4.       Print settings >
       5.       Preset: Epson Left imediaT T 265gsm
       6.       Paper Size: Super A3 / B

Thursday, 26 April 2012

Fashion: Day 4: 'Shoot' Day

Today was our production shoot day, therefore we decided to arrive at 8:30 to give us and the hair & make-up artists plenty of time toget organised, get the models prepared and finalise any issues with styling and set.
While Tom Williams & Maria Leao did Esteph's styling Marin, Sacha & I decided on the clothing for Ollie to wear in our shoot, he had with him a variety of shirts ranging from white to blue to lilac, ties from simple black to woolen & two jackets- a grey tweed and a dark navy. After trying on different combination we decided that the best combination for our shoot was the white shirt, navy jacket with a blue woolen tie which was a good contrast and conflict against the red dress as well as linking in with the blue of 'The chinese Girl' painting. Once Esteph was made up we got her dressed and had her put on some high heels with platforms to enhance her height in the image, these were her own as we were not goin to see them therefore did not need to be 60s themed.

Tom Williams styling hair
Maria Leao doing makeup

Female model in place looking photographed through window
When repositioning Esteph after each break we carefully flared out the train to our desired directionality and length directed by someone always looking through the camera.
After checking of the list of things to look for and change in the image mentioned in the previous blog:


1. Do grey card test and alter lights eg. gels to cancel out unwanted corrections.
2. Make sure there are no reflections from lights in the TV, window, picture & clock.
3. Make sure props are correctly positioned and can be seen when models are in place eg. TV, curtains, bedding (duvet, towels, cushions), mirror and desk.
4. Decide on clothing worn by Ollie.
5. Check lighting positions on both models.
6. Check for shadows on door from Esteph’s arm due to position of lighting.
7. Check the lamp shades material is not flapped down and noticeable.
8. Decide whether to use Arri 650w light on goal posts to highlight Esteph more.
9. Take biscuits out of packets and place on doilies. 
10. Get out guns, camera, cigarettes & jewellery ready more dressing models. 

we did final light testing on both of our models, figuring out exactly where they had to stand and sit and how they needed to angle themselves etc. to look effective in the shot as well as well lit. We decided to experiment with some more highlights on Esteph's hair to distinguish it slightly from the background as well as highlighting the grand hairstyle; this was done by adding in the Arri 650w light from above which Jonathan helped us to test.
 

Light experimenting
After this was tested and figured out we moved on to test shots where we begun to direct both the models as to the exact feeling we wanted them to express; for Ollie he was to look unaware of what danger stood behind him looking involved in photographing secret documents.


Meanwhile Esteph was to aim the gun at Ollie creating a sense of dominance in the room (although in reality aiming above & behind his head) with her chin raised to give highlights on her cheek bones, with a superior, slightly arrogant but powerful expression almost smirk-like; as the shoot progressed both models relaxed into their roles particularly noticeable in Esteph as the facial expressions become more natural and despite fatigue she was able to keep the gun position well.


Throughout the shoot we also constantly checked hair and make-up for any tweeks we needed to make such as counteracting any sagging of the beehive and retouching lipstick etc. We also experimented a little with a different jacket for Ollie near the end of the shoot to see the look of this colour giving us the ability to compare and decide our preference in post production.
When taking our photographs our final settings were at 80mm, F:8, shutter at 1/15th & ISO 100; I also took a photograph of the focus when we got it perfect to allow me to check for any changes after breaks as the depth of field was still very shallow due to the sensitivity of the Hasselblad.   


We took several short breaks and lunch break throughout the shoot to allow our models to rest from posing and exposure to the hot lights as well as turning the lights off to allow for them to cool for a while. 
For most of the shoot we photographed through the persepx as I feel there is a slight density change with and without it in allowing the audience to realise whether there is a plain between them and the scene. However we also did a few tests without the perspex as we did have difficulty with the sharpness of the focus due to the perspex; so we did this to experiment with difference in density.

Cleaning/removing perspex
After the models had left we exported all of the images on to a back up hard drive to make sure we had a set of safe copies. We switched off and unplugged all of the lights, then we removed any of the little props that we could, to allow for a much safer studio space to take down the set tomorrow.   
In the morning Sacha and I are planning on taking some of the props be had borrowed back to the shops and then will return and continue to help dismantle the set. We have transport organised to remove all of our large pieces of furniture away and taken back to the drama society we borrowed them from by 5. We will also try to sort out some issues with have with dirt on the dress that occurred during the shoot so that we can return it to the store we pruchased it from for a pre-arranged 90% refund.
Finally if we have time we hope to go through our images and make a choice or selection of final choices to do a test print so that we can see how it appears printed and figure out changes that will need to be made to it on photoshop in our post-production.
Overall we are all very pleased with how the shoot went today as there were no major hiccups or issues that weren't easily resolved; and the group seemed to work fairly well as a unit supporting our make-up artist, hair stylist and models throughout the day without any fallouts or arguments.

Wednesday, 25 April 2012

Fashion: Day 3: Final Lighting and testing

Today's production was focussed mainly on finessing the lighting in particular the positioning of all of our lighting, brightness of each individual light in relation to the other lights and light metering to get the correct exposure on the camera; however we were also experimenting with the use of glycerine to create the look of raindrops on the window. Again the following is a list of the tasks we completed in preparation for the shoot tomorrow:

1.  For the lighting we focussed firstly on how we would subtley light up the brickwork around the window frame; by blacking out the area behind the window and then using a reflector we were able to control the light spread. A light sits below the window faced away which in turn reflects back to create the look of a street lamp glow. The use of spun and neutral density gel allows us to soften the lighting so that it is not extremely over powering or bright.
7
After realising the setttings were incorrect on phocus we tweeked our lighting brightness and did light readings to tackle the changes.
We began with the space light, using the dimmer to increase the brightness, we experimented with a strip of black around the whole of the diffuser but in the end decided that a large flag would create a better graduation in light spill on the wall, creating the feel of a room light.   


4
We then figured out the level of lighting we wished for coming from the hall area; to reduce issues of shadow on the door we moved the light which acted as a hall light high up to the left of the doorway with spun attached to reduce the strength. Keeping the light in the same place we then added flags to the light travelling through the door to again diffuse it and make it much less harsh as well as reducing strange shadows which we did not want cast.    


 2 & 3

To accentuate the female figure and the red dress we used a light softened a little by a flag and shaped by the barn doors and another opaque flag; the alcove and wall behind the figure is then put slightly in shadow which also highlights the female model further.
We also have another light attached to the goal post with spun attached positioned and angled towards the female model so that if we need extra highlights we can add this light in.  

6
We then moved on to the lighting on the secret documents on the desk and slightly highlighting the male model. We exaggerated the prop lamp light by adding a dedo light attached to a clamp above with orange gel attached to create the look of light spread over the desk and spilling on the model's face; this lighting is a lot softer and duller than the lighting on the female model to highlight the importance of roles within the image. 

8
 After all of the main lights were positioned and exposed correctly we then added two extra lights to take the edge off of the harsh shadow cast on the surrounding props; in particular the side table with teasmade on and trouser press. We used an Arri 150w and a dedo light both on mighty baby stands which simply add slight highlights to the surfaces by using barn doors to direct both. This also lifts the light in the room slightly which creates more of a graduation of shadow on the walls.   


5
1
3. We then experimented with glycerine mixed with water to create raindrops on the acrylic window enhancing this atmospheric feeling through use of pathetic fallacy. However when we did this we found that it created unnecessary distraction and due to many different lights around the set the water reflects too much which obscures the scene. So we are very pleased that we tried out this technique but in the end have decided not to use it.


 4. After doing this experimentation Martin attached the real perspex to the window frame through the process of beading by cutting long, thin pieces of wood which he screwed in to secure the acrylic against the frame; by having the perspex completely flat we eliminate any possibilities of reflections.

5. While in the studio I drew a quick diagram of the lights which I have redone on the computer; I will take this in to the shoot tomorrow to make sure we check all of the lights as well as making sure all of the lights are on before we start shooting.


1. Arri 150w (on bed highlighting props)
2. Arri 650w (through door + diffused)
3. Arri 300w (in hall highlighting wall)
4. Space light (on goal posts)
5. Dedo Light (highlighting side board)
6. Arri 300w (diffused on female model)
7. Arri 650w (blue & neutral density gels + reflector)
8. Dedo light (orange gel, on desk & male model)
a. Arri 650w (possibly used to highlight female model)

6.   While the others were finishing off the lighting, Lucie and I constructed the changing area by using poly boards and C stands, areas behind the wall where all of our equipment has been cordened off and a hair and make-up/ comfort area has been cleared and ordered to be used before and throughout the shoot by the models and artists.

7. With the input of others in the group I made a list of actions we need to check off tomorrow:

- Make sure arri 150w on bed is not creating an obviously distractive reflection in the TV screen or metal surround.
- Make sure props are correctly positioned and can be seen eg. the mirror, the duvet/sheets/pillows/towel, desk and lamps etc.
- Check reflections in the mirror, window, picture and clock.
- Check lighting positioning on both models.
- Check for shadows on the door from our female model's arm (issue raised during lighting)
- Check the lamp shade in the background for fabric flapped down.
- Decide whether to use Arri 650w on the goalposts to highlight the female figure further.
- Take biscuits out of packets
- Get out guns, camera, cigarettes & jewellery ready to dress models before shoot. 
- Do grey card test on the image as unfortunately we have not done this yet, however hopefully any gel changes will be minimal and easy to fix. 


8. Tomorrow the group, Esteph, and our hair & make up people, Tom and Maria will will be in at 8:30 so that hair and make-up can be started as soon as possible as tests have shown we need to leave around 2 hours more them to do this.
Ollie will be arriving around 9 as there is less that will need to be done to him, however we still need to make final decisions on clothing which we will choose from his choice of jackets, ties, shirts and hankies. Before we start the main shoot we will also finalise the desk position and height and the position of the lighting. 

I am really looking forward to the shoot as I feel as a group we have worked well together and are very organised in all areas of the set build and shoot; I feel we will be able to experiment with different positons for both models to see the effect of moving them on their importance and audience focus,  as well as possibly lowering or heightening the brightness of lights to get different effects on the models and set.

Tuesday, 24 April 2012

Fashion: 'The Quiet American' Film Research

When Michael came to check in on our set build today and we described our narrative he drew our attention to a film called, The Quiet American.

Set in the early 1950s in Saigon, Vietnam, during the end of the First Indochina War, on one level The Quiet American is a love story about the triangle that develops between Thomas Fowler, a British journalist in his fifties; a young American idealist, supposedly an aid worker, named Alden Pyle; and Phuong, a Vietnamese girl. On another level it is also about the political turmoil and growing American involvement that led to the Vietnam War.


Thomas Fowler (Michael Caine), who narrates the story, is involved in the war only as an observer, apart from one crucial instant. Pyle (Brendan Fraser), who represents America and its policies in Vietnam, is an OSS (Office of Strategic Services) operative sent to steer the war according to America’s interests, and is passionately devoted to the ideas of York Harding, an American foreign policy theorist who said that what Vietnam needed was a "third player" to take the place of both the colonialists and the Vietnamese rebels and restore order. This third player was plainly meant to be America, and so Pyle sets about creating a "Third Force" against the Viet Minh by using a Vietnamese splinter group headed by corrupt militia leader General Thé (based on the actual Trinh Minh The). His arming of Thé's militia with American weaponry leads to a series of terrorist bombings in Saigon. These bombings, dishonestly blamed on the Communists in order to further American outrage, kill a number of innocent people, including women and children.


Meanwhile, Pyle has stolen Fowler's Vietnamese mistress Phuong (Do Thi Hai Yen), promising her marriage and security. When Fowler finds out about Pyle's involvement in the bombings, he takes one definitive action to seal all of their fates. He indirectly agrees to let his assistant, Hinh (Tzi Ma), and his Communist cohorts confront Pyle; when Pyle tries to flee, Hinh fatally stabs him. Phuong subsequently returns to Fowler, and while the local French police commander (Rade Šerbedžija) suspects Fowler's role in Pyle's murder, he has no evidence and does not pursue the matter.


Like our image the film is set during the war time when there was alot of tension between the East and West which again is represented through their characters and their relationships. Due to the war there was a lot of spying to try and find information out about the oppositions tactics and weaponry.
Due to the different relationships in the film a sexual tension is created between all three characters which we want to have in our image between the two models; on the one hand there could be this passion and love between the two characters which in our set is highlighted by the location and small space in which they are cofined to. However there is also this hatred, anger and negative tension in the room which we will exaggerate by using atmoshperic lighting and props eg. the gun and cigarettes.
Particularly on the front cover there is a hint of the colour red used to develop images of aggression, danger and blood in our imagination which prepares us for the film; again we are featuring this tactic through the use of a red dress emphasising the woman as the danger in the room.   
By researching this film I have created a clearer idea in my head of the sort of feeling we want to have radiating off of each character as well as the general lighting and atmosphere of the room.

Fashion: Day 2: Lighting

Today was mainly about lighting the set and finessing any little details within our set such as the positioning of props and the camera; again I have written the stages we tackled throughout the day:

1. We began by wiring up the reflector on the space light to the correct height so that we got the spread we wanted as well as making sure it was out of view from the camera.


2. We then eliminated any reflections by using reflectors blocking the space light from hitting the glass over the painting as well as reducing light on the walls.
3. When we put up lighting in the hallway area it reflected off the corner of the television which catches your eye when viewing the image so Sacha and I figured out the position of the television to eliminate this issue.
4. We also put up poly boards and black out sheet behind the camera to stop reflection of the white wall in the set as well as in the perspex once we put that in.

3. Sacha and I decided that the carpetting needed to be sorted out so we used flooring double sided tape to stick all of the edges down tightly and smooth out any lumps. We also used pliars to remove any staples that had previously been used to fix it down by the Marquee company we rented it for free from; we did this to make sure that the set was safe and the dress doesn't get damaged on shoot day. 


4. While testing the lighting and angle of the camera I noticed that we needed another panel on the wall facing the window therefore I painted another piece of panelling and slotted it in place. If we decide to move the camera at all we have a little more flexibility when shooting on the day. 

5. Ian used his lighting plan to position the chosen lights in the hall coming through the door, another on the goal posts aimed at the female model and one highlighting the desk shone through the desk lamp; we will continue to test these tomorrow.

6.  Martin added in an extra nail to hang the painting on to move it over ever so slightly and to stablise it more.

7.  The flap mirrors on the side table was angled to stop any unwanted reflection, but we then realised it was reflecting the unseen wall by the doorway; therefore we added an extra panel & wallpaper & dado rail. By angling it like this the mirror will also reflect the red of the dress if we wish it to, but this will be down to experimentation on the day of the shoot. 

8. We then experimented with curtains round the edges of the scene to create a more voyeuristic feel and a more cosey atmosphere which should be felt in a hotel room. After several shots we decided to only include curtain on the left of the frame which shapes the view more but does not obscure any of the scene or props.


8. We experimented further with the camera position to finalise the it, after moving and locking the stand down we taped all of the different moveable parts down to eliminate any possible movement which will make it easier to set up for the shoot.

9. We also experimented a little with the dress in shot to play with reflections, position and use of lighting to highlight it; however we will further discuss and finalise these issues tomorrow when we will have stand ins to model for us.


We felt that we moved forward today however due to high organisation yesterday we felt we didn't want to rush any decisions as we still had another day to test lighting and do any final changes to the set before our models come in.
Therefore tomorrow we have the following issues to clear up; we will sort out the 'street' like lighting we will install to slightly highlight the brick work, as well as finalising the light on the desk & male figure and the female character which will involve deciding on the level of brightness for each and doing light metering to prepare for the final shots. Through this process we will again be installing any extra flags we need as well as possibly added in boards on top of the walls to graduate the lighting to create a shadow at the tops of the walls.
We will add in our acrylic to check for any reflections we may need to remove and then experiment with rain drops again to create texture and decide whether we will want to include this  technique on the day of the shoot.

The final thing we will do tomorrow will be to tidy up the corner of the set where our models will be, we will then create a changing area by putting up polyboards as well as constructing an area for hair & make up as well as a comfort area for our models, Esteph and Ollie while we're making changes during the shoot.

Monday, 23 April 2012

Fashion: Day 1: Construction & Decor

 The following points are the tasks the group managed to finish in the first day of our set build:

1. Put carpetting down- in rolls which made it easier to manoeuvre & lay down.
2. Constructed the walls- used both constructed and manually constructed stands to build walls, screwing flats together after leveling them to enable us to accurately wallpaper the walls.
3. We firstly attached the skirting, pannelling and dado railing to the walls.


4. Then we attached the wallpaper which we were very fortunate to have Martin's friend Murray available to help us with.
5. Meanwhile the space light was put up on the goal posts to give us an idea of the overall lighting and atmosphere created by the combination of our decor, props and lighting.


6. Martin & Murray then hinged the door to another flat which was attached on the end of the right wall to create a small corner behind the open door. A frame was also attached above the door to create the look of a surrounding wall which was edged by cream painted architrave.

7. Sacha and I then continued to attached the door handles and number '65'on the front. 
8. Sacha and I then began to move the props in to the set joined by others later. By using the hasselblad in the correct position to capture images we position the props in the right places. 
9. By using the live view in the programme phocus, we worked out where the painting should be positioned and continued to hang it.


10. After constructing all of our set we finally created a frame around our window using MDF to attach our brick wallpaper to, to create the look of an outer wall and obscuring the view around the window frame.


Day 1 Final Image

We also went to Wickes to buy perspex for our window which we took down to lower 4th to be cut to the correct size of 980 x 710mm to fit our window frame. 
We felt today was very successful and went a lot more smoothly than I imagined and planned to due unforseen issues; however we didn't have many problems at all throughout the day and if any they were easily solved. I also feel we are much further ahead than we thought we would be as the constructing of walls and decor was planned for today and other decor and props tomorrow; however due to quick construction we will now be experimenting with the lighting tomorrow.

Firstly to decide on the correct level of light being produced by the space light over the whole scene and then other lights such as the hall light and specific lights to highlight areas of the scene such as the figures and the desk.

I would also like to eliminate any reflections we do not want in our set particularly in the glass of the picture, the side table mirror,the TV screen and the window, which I imagine we will reduce through use of angles and dark surfaces. If we have time I would like to experiment with the idea of rain drops on the perspex which although we have already look into had not conclusively decided against or for it. I feel due to the shallow depth of field the use of rain would create an interesting texture and add pathetic fallacy to our image as we want to promote a dramatic, tense scene.

Wednesday, 18 April 2012

Commission: Pinhole camera process and final images

For the second part of the commission unit we were given the task to make a pinhole camera and produce a final image. For the pinhole construction workshop we were asked to bring a box around shoe box sized; as I had already made a pinhole camera at A Level I decided to experiment with a different shaped container. I chose a plastic tub I had at home, quite large and cylindrical which I thought would produce a very large image.

Because the tub was see through I decided to prepare it before the workshop by sanding it down, painting it black and taping the whole of the outside up with electrical tape otherwise I would not have got my camera finished that day. When shooting I also made sure the box was light tight by taping around the edge of the lid.

When I showed the tub to Colin he explained that I could make a 360 degree image by attaching a tube to the centre of the lid, attach the paper round the centre and make four pinholes at equal intervals around the outside of the tub which I would then open up at equal times while keeping the box in the same position.


 Used pin to make the pinhole in terms of the distance between outer and inner surfaces to get the correct depth, then used the the pinhole F stop 264 to relate to the dial we were given which gives an exposure time which can be converted from a lightmeter reading with an ISO of 5 which was the closest to the ISO of photographic paper.  


For my final image I decided to feature my families dresses again like my final commission images; but for my pinhole image due to the way the image would flow together I decided to try and create a blurred, ethereal image by using my family as models. My nan modelled with her function dress, my mum with her wedding dress, my sister with her prom dress and me with my christening dress. Unfortunately due to the dull weather conditions, my lightmetter gave me quite slow timing which translated as 4 minutes for my pinhole camera. My relatives were very understanding and happily sat for me for two separate images.    

I was very annoyed when one of the images ripped while I was trying to remove it from the tape in the box however luckily they were both expose correctly. These are my two final images theat I must choose from (positive and negative forms):


I am not sure which image I will choose yet; however I feel that the ripped image is a lot more centralised and more flowing; before definitely picking I have done another print of both with slightly lower exposure time as I feel I lost a lot of the contrast with too long an exposure on the light box of 10 seconds which I reduced to 7 seconds.

Overall I am very pleased with my final images as they are correctly exposed and create the effect I was hoping to achieve with a sort of flowing, connected look between me and my other female relatives. I choreographed all of us to be sat in a similar way with the dresses facing in the same direction. In the bottom images I had everyone look down while in the top images I had everyone look at the camera; again I like the way it looks as if we are confronting the viewer allowing the audience to see our facial features and notice the similarities between us.

Tuesday, 17 April 2012

Final Set-build Workshop

For our final set-build workshop we focussed mainly on trying to finalise our decisions on set depth, size of window, position of camera, lens choice and model positioning.
We first considered what sort of window we would want, we used pieces of wood to create a frame allowing us to also experiment with sizes. We also used a strip of tape to experiment with the idea of a divided framework; the first image shows the strip in the centre of the frame however due to the angle of the camera from the window, approximately 45 degrees, the strip becomes angled and not centred. This makes the central beam look wonky and out from the rest of the angles in the scene and makes it difficult to position the model without obscuring her. 


We then moved the central parting so that it divided the image into a smaller section on the left and larger section on the right. This allowed us to divide up the characters more and create this East vs. West division with the Western character being made to look smaller and less important. 
 In the end however we chose to get a window frame without any partition as we felt without it there is a more voyeuristic feel with the audience made to feel part of the target of the female characters gun. It creates more of a dynamic scene with line of the frame drawing your eye in to the image and towards the female figure.
In the end we have decided to use a window of the measurements: 35in x 24in, without a partition anywhere through the frame. 

In the images we tried to use similarly sized objects to represent our props for example, a work table as the desk, a computer as the television, a trolley as the trouser press. In our images the objects are in the same place as we plan to put them in the final set build; otherwise issues such as the height of the desk and distances between props will be tackled and sorted on the week of the shoot. We also experimented with the positioning of both models, starting with our initial idea of the woman in the doorway and the male character at the desk by the window.


 We wanted to experiment with size of models in proportion to each other in the frame as although the female model is the centre of attention she in effect will be dominated by the males size, although I feel we've tackled this by the clothing they will be wearing we still wanted to enhance the images 'wow' factor as much as possible.


In the end we decided to keep the male model where he was because by himsitting on the body the audience is then disconnected from the scene. We did move the female model forward a little but the main different was the distance between the frame and camera and the lens used.
We moved the camera further back but by using a longer lens we were able to compress the scene making the figures more proportional to one another. This makes the woman more central to the image and much more of the focus; and despite the height of the camera being no different from the previous shots the camera begins to look more level making the models look less dwarved. We are very happy with this result and hope to recreate it on the day however of course we will also play around with different ideas on the day such as the position of the male model eg. standing up/ sitting down/ leant over etc.    

From this days workshop, Ian produced a diagram of our set with all of the measurements which we photocopied and gave to Jonathan so that he knew how much space we would need. This also allowed us to give measurements for carpet to our supplier who is giving us the carpet for free. Jonathan has looked at all of the group's diagrams and decided to put us into studio 1 and although we haven't worked in that studio yet we presume that we will have enough space to create our scene in there due to the very long set build we have.