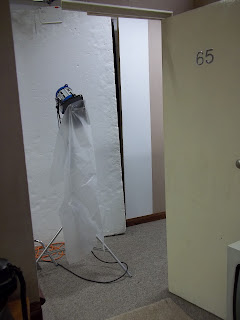
Today was mainly about lighting the set and finessing any little details within our set such as the positioning of props and the camera; again I have written the stages we tackled throughout the day:
1. We began by wiring up the reflector on the space light to the correct height so that we got the spread we wanted as well as making sure it was out of view from the camera.
2. We then eliminated any reflections by using reflectors blocking the space light from hitting the glass over the painting as well as reducing light on the walls.
3. When we put up lighting in the hallway area it reflected off the corner of the television which catches your eye when viewing the image so Sacha and I figured out the position of the television to eliminate this issue.
4. We also put up poly boards and black out sheet behind the camera to stop reflection of the white wall in the set as well as in the perspex once we put that in.
3. Sacha and I decided that the carpetting needed to be sorted out so we used flooring double sided tape to stick all of the edges down tightly and smooth out any lumps. We also used pliars to remove any staples that had previously been used to fix it down by the Marquee company we rented it for free from; we did this to make sure that the set was safe and the dress doesn't get damaged on shoot day.
4. While testing the lighting and angle of the camera I noticed that we needed another panel on the wall facing the window therefore I painted another piece of panelling and slotted it in place. If we decide to move the camera at all we have a little more flexibility when shooting on the day.
5. Ian used his lighting plan to position the chosen lights in the hall coming through the door, another on the goal posts aimed at the female model and one highlighting the desk shone through the desk lamp; we will continue to test these tomorrow.
6. Martin added in an extra nail to hang the painting on to move it over ever so slightly and to stablise it more.
7. The flap mirrors on the side table was angled to stop any unwanted reflection, but we then realised it was reflecting the unseen wall by the doorway; therefore we added an extra panel & wallpaper & dado rail. By angling it like this the mirror will also reflect the red of the dress if we wish it to, but this will be down to experimentation on the day of the shoot.
8. We then experimented with curtains round the edges of the scene to create a more voyeuristic feel and a more cosey atmosphere which should be felt in a hotel room. After several shots we decided to only include curtain on the left of the frame which shapes the view more but does not obscure any of the scene or props.
8. We experimented further with the camera position to finalise the it, after moving and locking the stand down we taped all of the different moveable parts down to eliminate any possible movement which will make it easier to set up for the shoot.
9. We also experimented a little with the dress in shot to play with reflections, position and use of lighting to highlight it; however we will further discuss and finalise these issues tomorrow when we will have stand ins to model for us.
We felt that we moved forward today however due to high organisation yesterday we felt we didn't want to rush any decisions as we still had another day to test lighting and do any final changes to the set before our models come in.
Therefore tomorrow we have the following issues to clear up; we will sort out the 'street' like lighting we will install to slightly highlight the brick work, as well as finalising the light on the desk & male figure and the female character which will involve deciding on the level of brightness for each and doing light metering to prepare for the final shots. Through this process we will again be installing any extra flags we need as well as possibly added in boards on top of the walls to graduate the lighting to create a shadow at the tops of the walls.
We will add in our acrylic to check for any reflections we may need to remove and then experiment with rain drops again to create texture and decide whether we will want to include this technique on the day of the shoot.
The final thing we will do tomorrow will be to tidy up the corner of the set where our models will be, we will then create a changing area by putting up polyboards as well as constructing an area for hair & make up as well as a comfort area for our models, Esteph and Ollie while we're making changes during the shoot.


No comments:
Post a Comment