After a lot of deliberation we decided to choose the image 1284 which was sort of in the centre of the shoot, once the models had settled into the roles but before they, particularly Esteph, became too tired. We looked specifically at the two characters in the image, their positioning in terms of the surrounding props & one another and their facial expressions; we were not too bothered about issues such as reflections as these could be edited out afterwards.
In our final image, both of our models faces or bodies are not obscured by anything such as the camera Ollie is holding, there are no strange shapes poking out from behind them as we found in other images eg. the TV & towel. We also looked a little at the lighting as in some of the shots the faces are not very well highlighted.
We followed Bjorn's guidelines of how to edit the final image very carefully including starting editing in phocus and then moving to photoshop as well as zooming to 100% and no further than 200% to do all of the editing. Once we had chosen the image I made the suggestion of making a list of all of our edits; we did this by scanning through the image for any dust, sratches or reflections as well as deciding on masks we needed to add to areas of the image.
- Remove highlights in the lamp & TV
- Lighten painting & remove smear
- Remove glare and smudges on window
- Remove crease in carpet
- Reduce highlight in trouser press
- Lighten bottles
- Lighten dress train very slightly
- Darken and add warm tone to bricks and curtains
- Remove specks on suitcase, TV, bottom of door & carpet in hall
- Remove mark on dress bottom left
- Dull down shine of TV stand
- Remove wood splinter on wallpaper left of Ollie's head
- Remove freckle of Esteph's chest
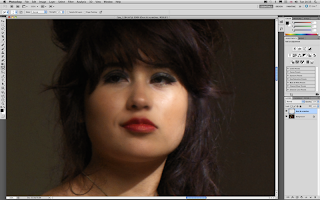
- Dull highlight under Esteph's right eye, sort smudged lipstick & highlight pupils
- Change window frame colour cast
- Slightly blur area behind Esteph to make her stand out
Phocus editing- curves & colour correction
 |
| Dust & Scratches |
 |
| Colour Balance |
 |
| Brick tone |
Lens Blur
Most of these edits are small changes that we could not have removed when shooting such as marks on props and clothing which were not obvious but may be when blown up to over a metre wide.
We managed to finish all of the editing starting on phocus and then moving to photoshop to use the spot healing tools and adding masks on Tuesday, so then on Wednesday, Martin, Lucie, Ian and I came in after visiting Fort Amherst to finish off the image ready for pritn adjustment decisions with Bjorn and then finally printing a proof copy.
Again by following Bjorn's guidelines we made a test strip showing a series of different bightnesses & warmth masks.
 |
| Print Adjustment Test Strip |
On Friday, Sacha, Ian and Lucie went in to meet with Bjorn who helped them work through the test strip and choose the right corrections to put on our final image; they then produced a proof print which we will hand in to Jackie Andrew on Tuesday along with a digital copy of the image.
 |
| Final image |


No comments:
Post a Comment